What you can do
Most ticketing software requires that you sell tickets using their event pages in order to create, send, and scan digital tickets. With Guest Manager, you have the option to use just our ticket creation and scanning tools! Of course, we also have registration, ticketing, invitation, and online RSVPs should you be interested, but they are optional.
That’s a long winded way of saying that you can import a spreadsheet of people, create digital barcoded tickets, email them to your attendees (optional), and scan/validate them on site at the event.
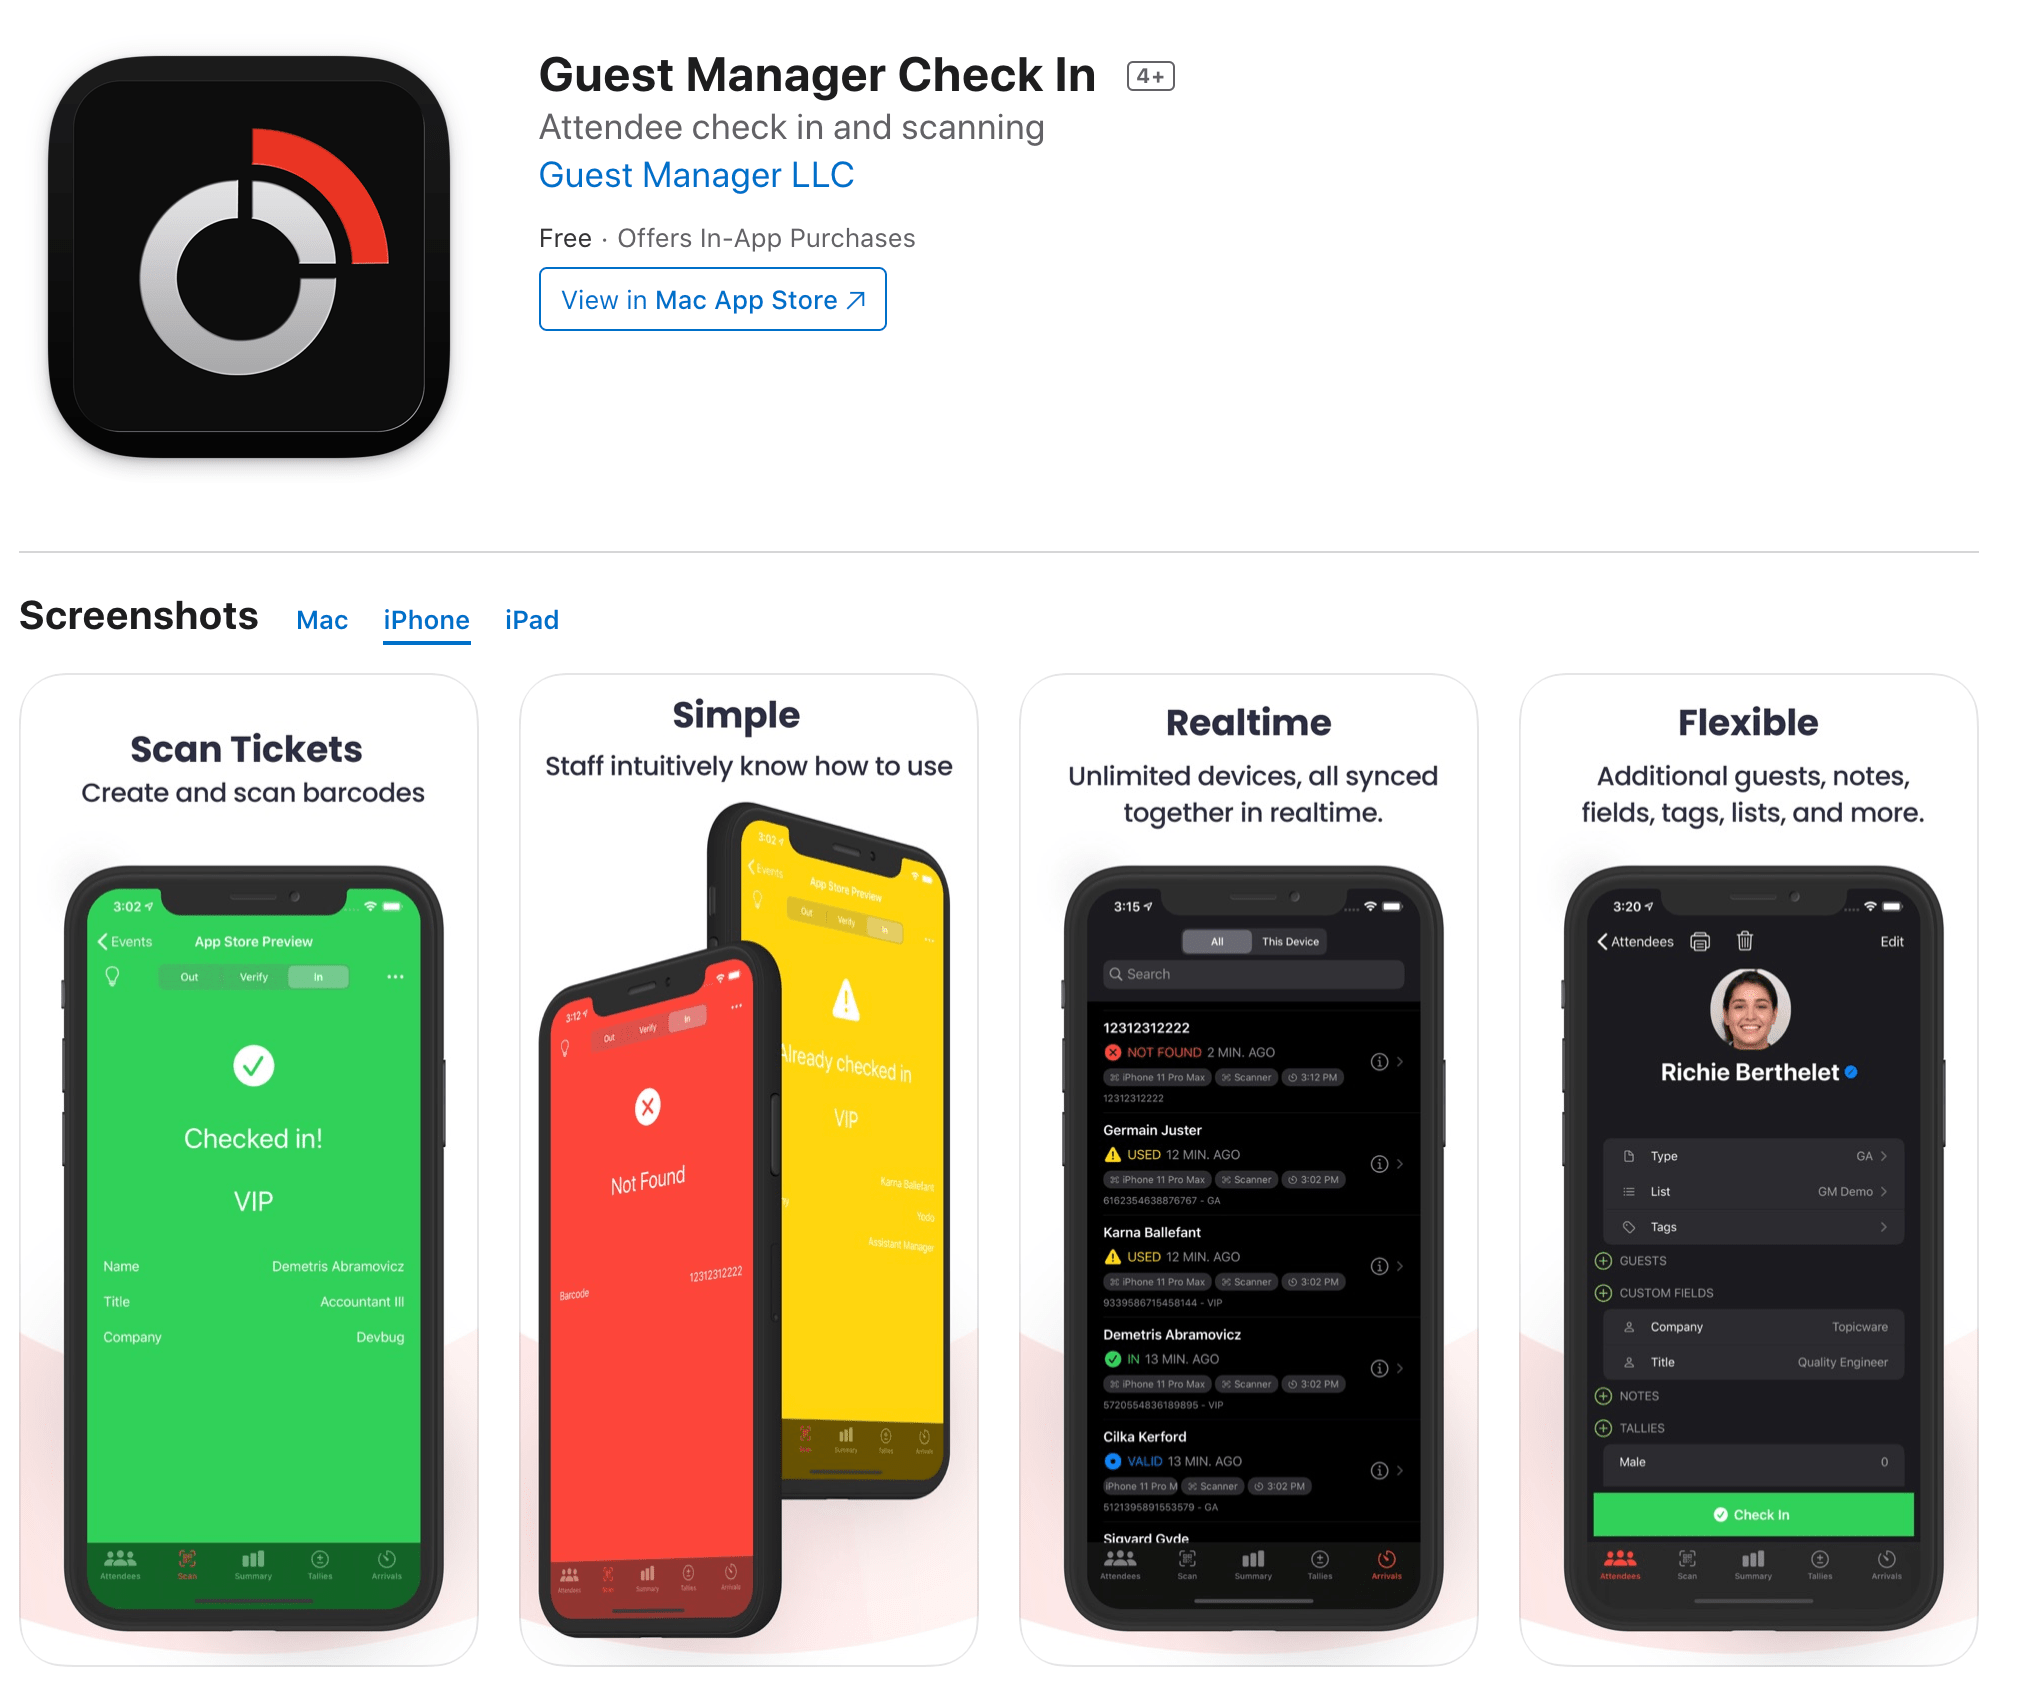
Test drive
Want to play around first? No problem, we have a simple test drive mode for you to try out ticket scanning on your own, without requiring a signup or any personal information.
Simple download the app in the iOS App Store, or Mac App Store, open the app and tap on Test Drive. Use the link above or simply search for “Guest Manager”.
To test ticket scanning, open one of the events, I suggest the “Basic check in event”, then tap on the Scan tab at the bottom. A popup will appear asking for your email address so the app can send you a couple of sample tickets to scan.
Run Test Drive mode on as many devices as you’d like! You will see them talk and sync together in real time. How neat!
Create an event
From the dashboard on your computer, create a new event.
Import attendees
Tickets can be imported, created manually, added via the API, and a few other ways (such as using our online registration tools). For now, let’s focus on importing as that’s most common.
From Attendees, click the green Add button, and click Import CSV

CSV errors Some customers have UTF-8 formatting issues when using excel. For a quick fix, try loading the spreadsheet into Google Sheets, and then exporting again as a CSV UTF-8 file.
Now, select your file, and click Import.
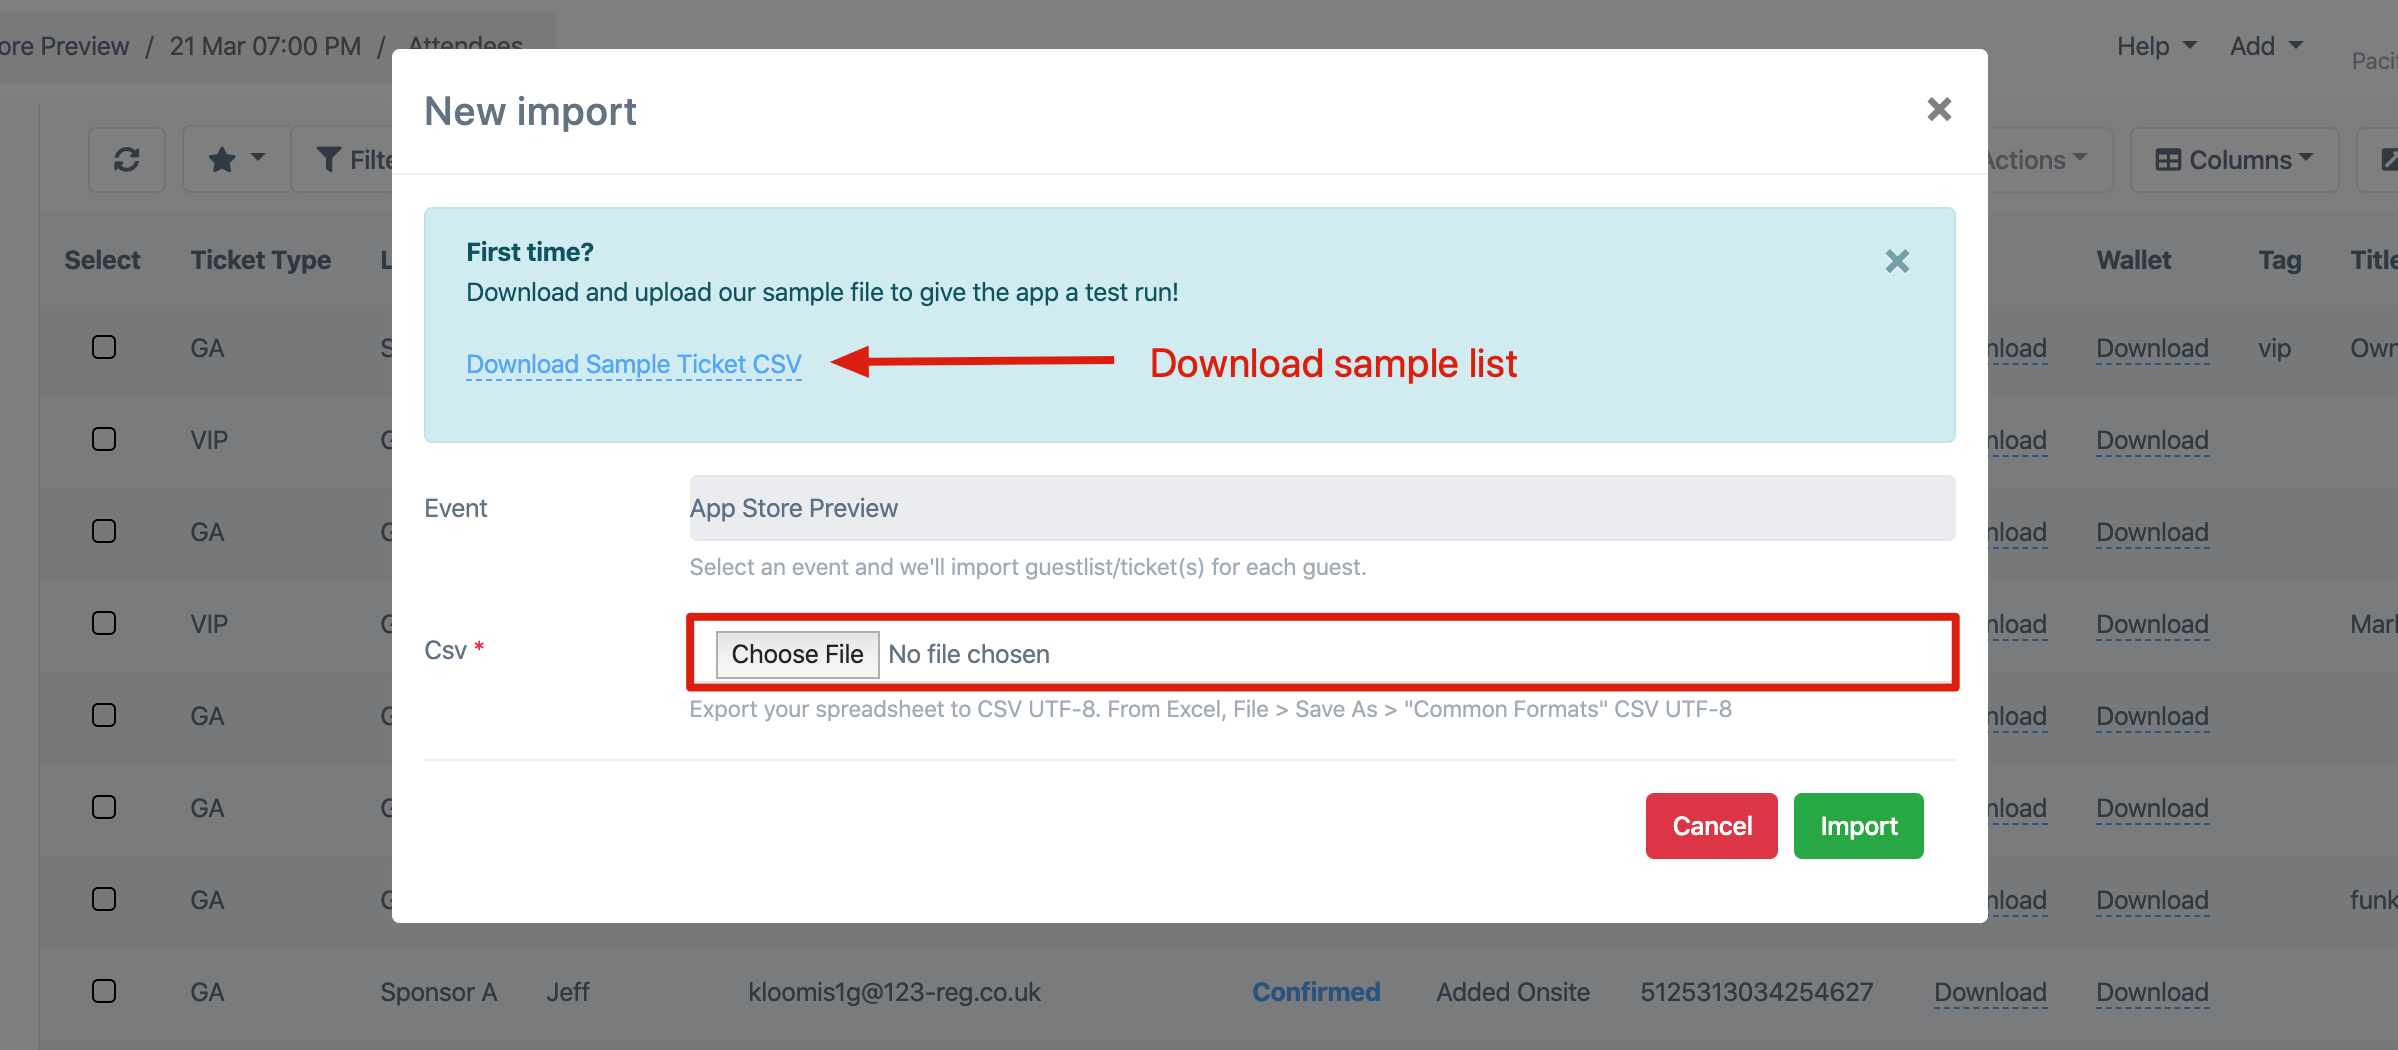
If you provided unrecognized columns, you will be asked to map your columns to fields in Guest Manager. You can learn more about all the possible import fields here.
Detailed information and sample import files here
Review the import result
Refresh the attendee list to see what we did. You will also receive an email with a summary of the import.
Set up a ticket design
In order to send PDF and Apple wallet tickets to attendees, you need to configure templates for each.
From Design and setup, click on Ticket design.
Refer to these articles to set up a PDF and Apple wallet ticket, respectively:
Set up the email
Customize the email that attendees receive with their ticket attached.
From Design and setup, click Emails, and then click on the Ticket sent email
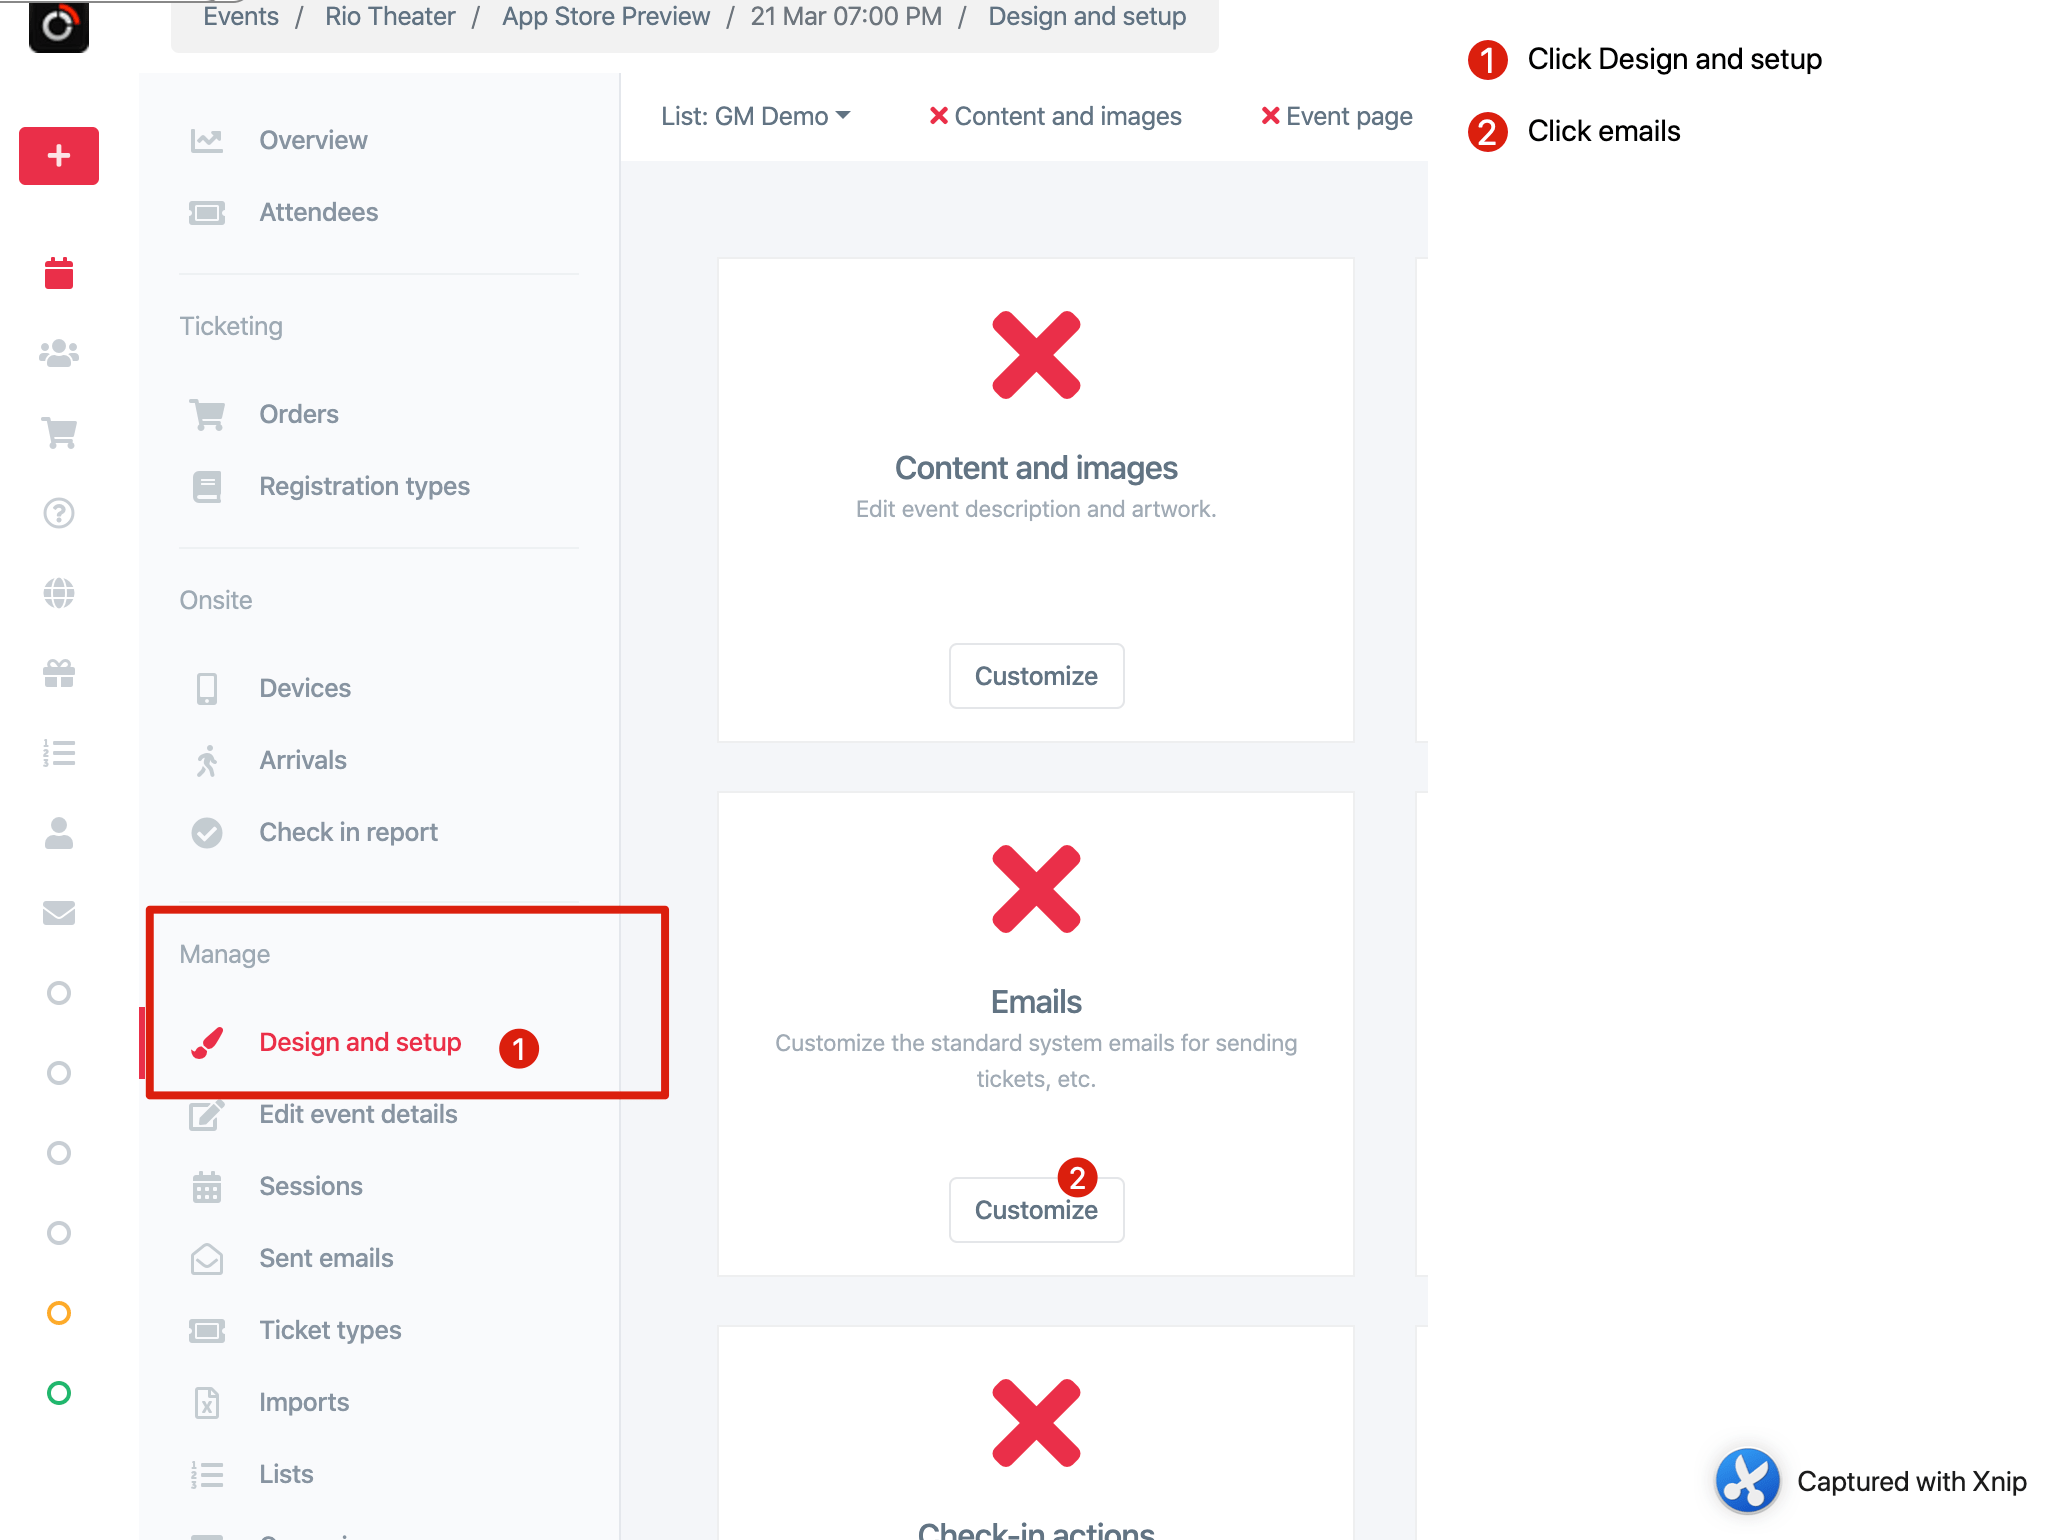
Then click on the Ticket sent email, and Create new

Add some content for your email. Only the subject and body is required.
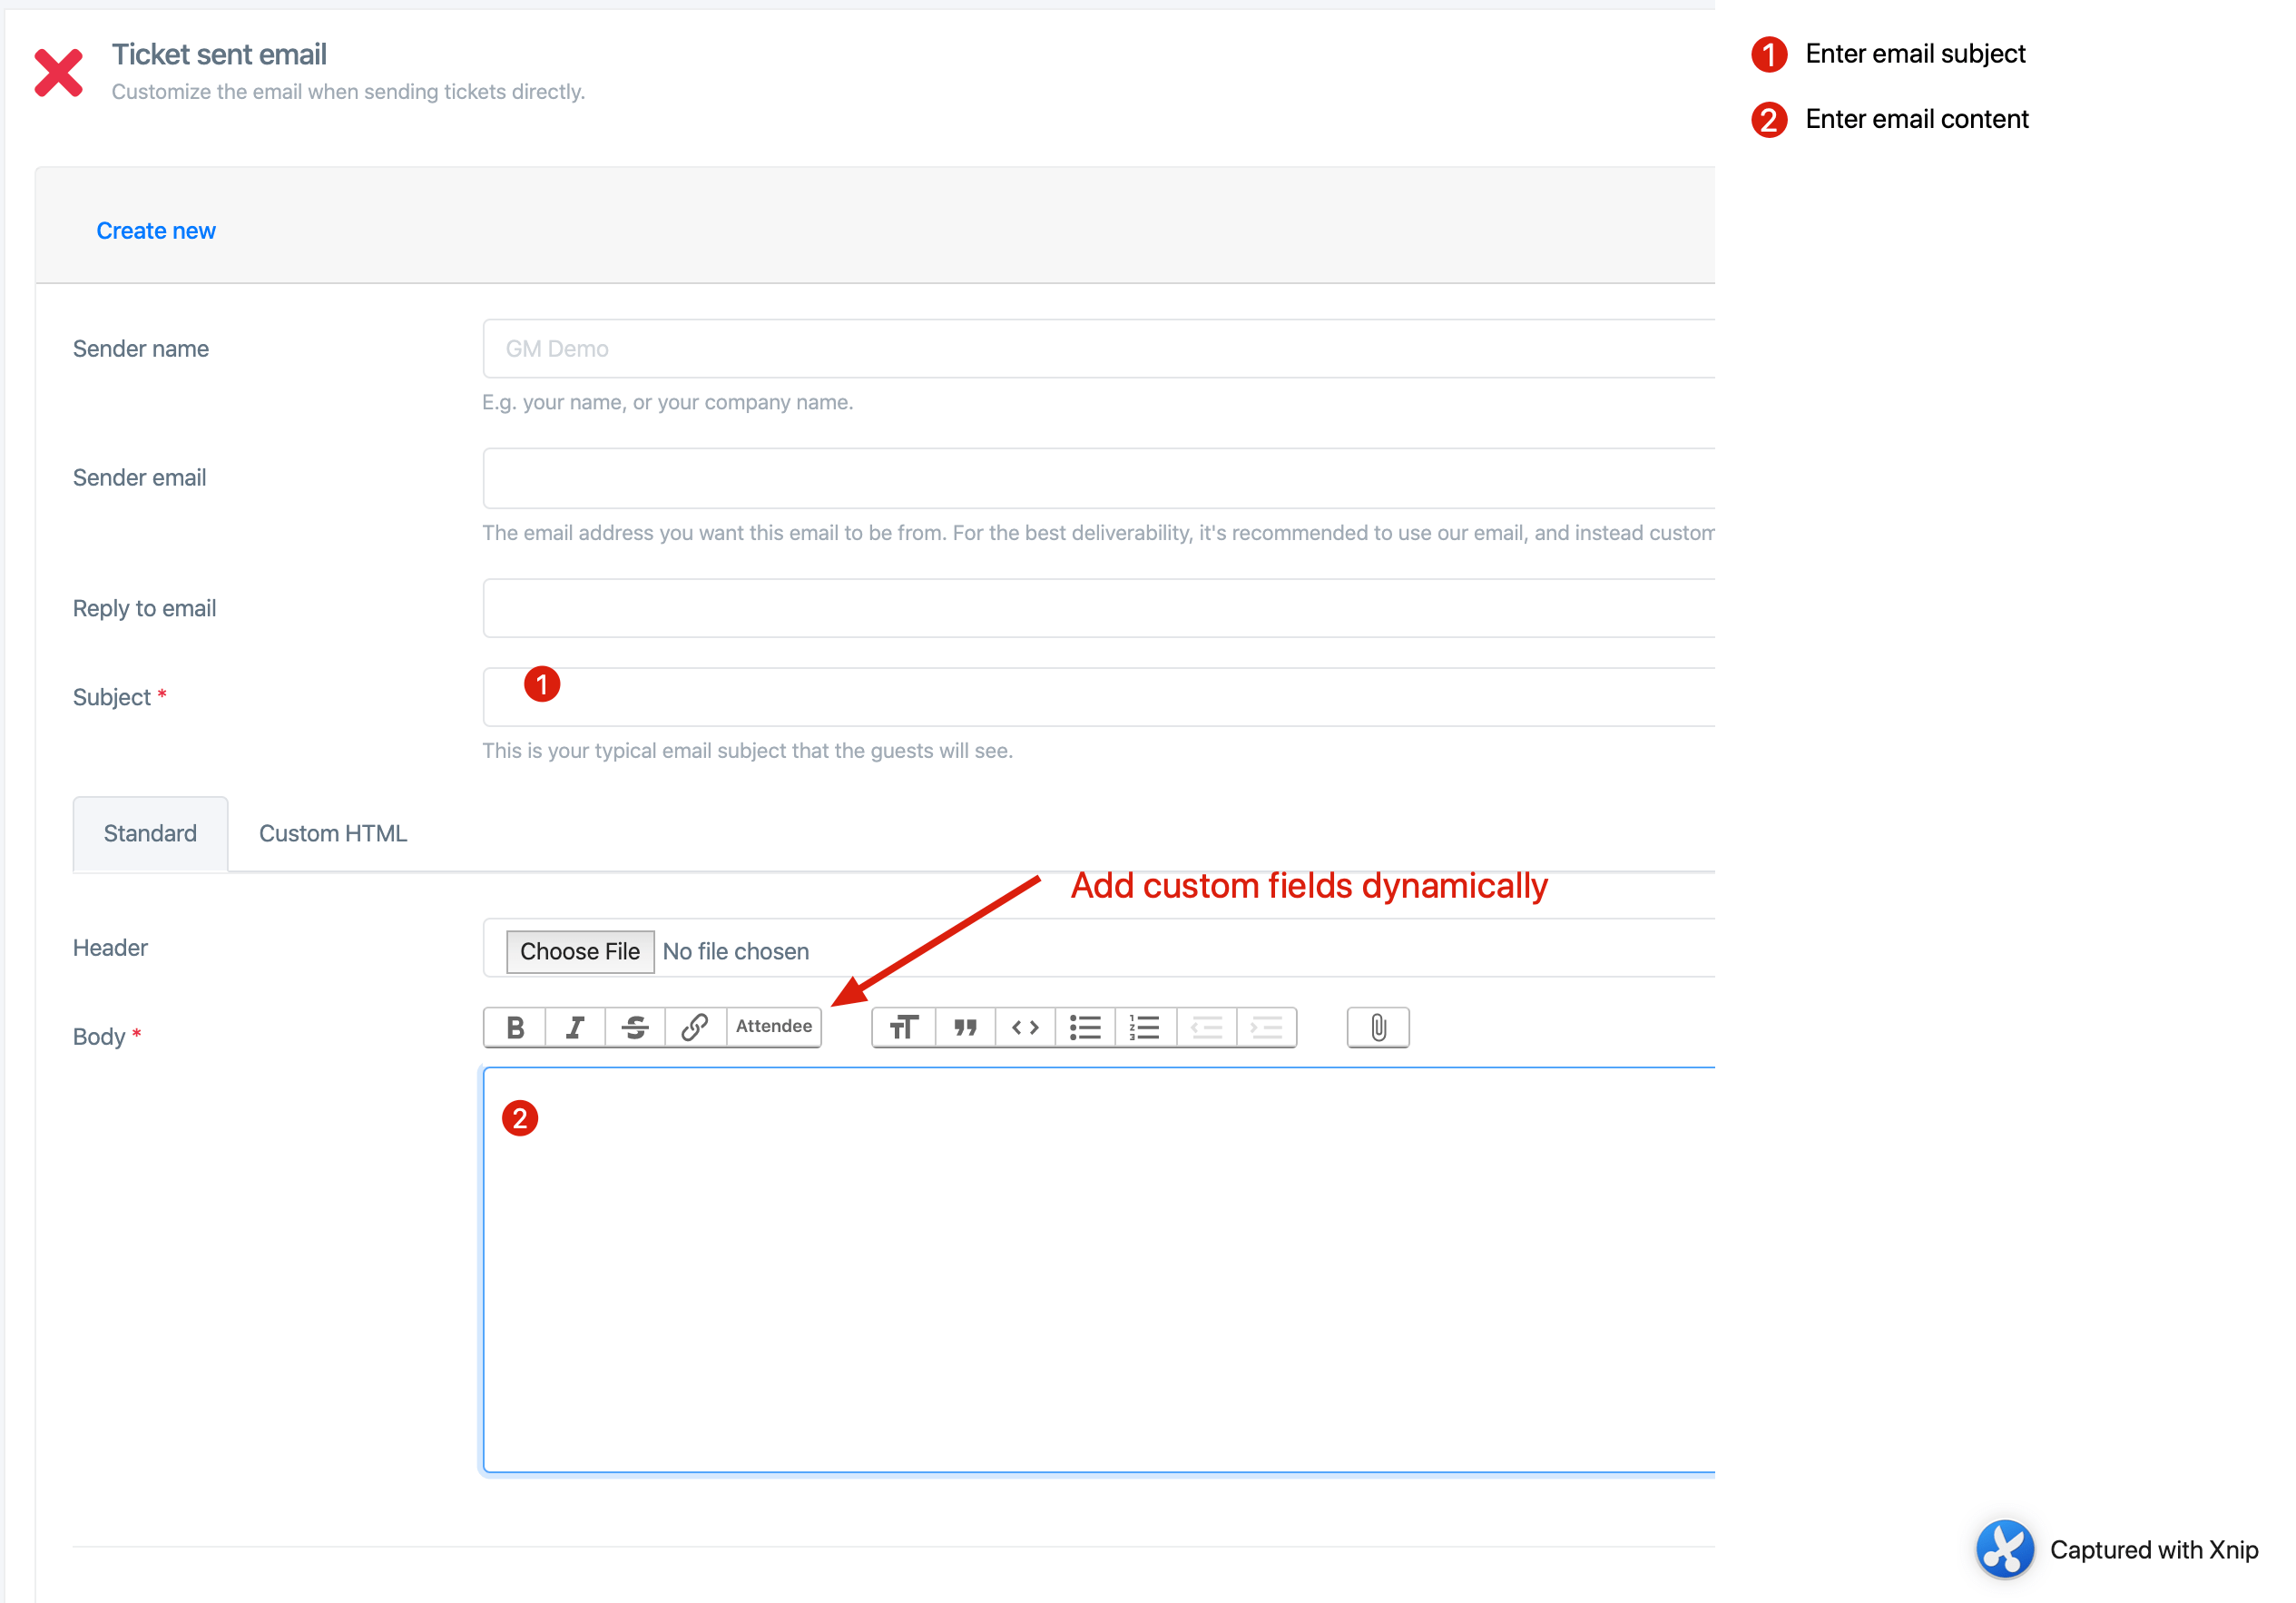
Click Save and confirm that the Red cross changes to a green checkmark, to indicate that you successfully set up the email.
Send an email
Go back to the Attendees list, click on the dropdown arrow next to Edit for one of the attendees, and click Email. This will send the attendee their ticket! Go and confirm you received the email.

Send emails in bulk
If the test email looked good, you can now send all the emails at once.
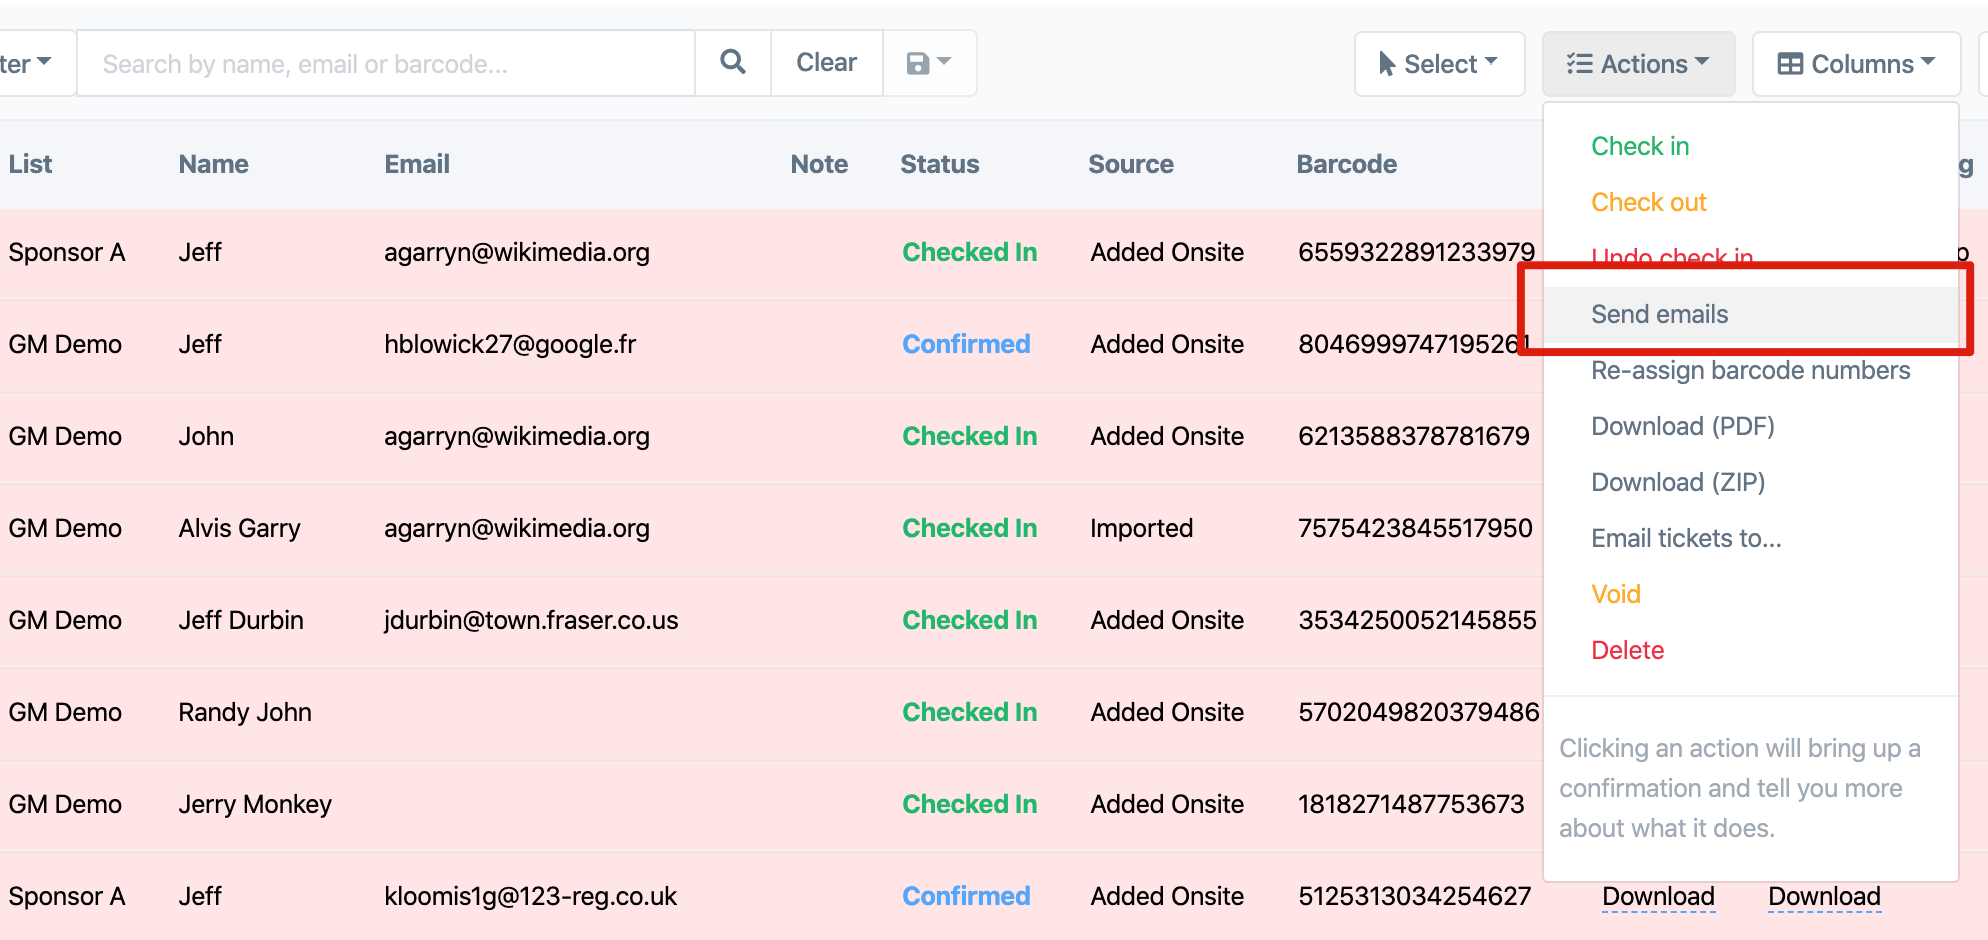
From the top bar, click Select, then All.

From the Actions dropdown, click Send emails
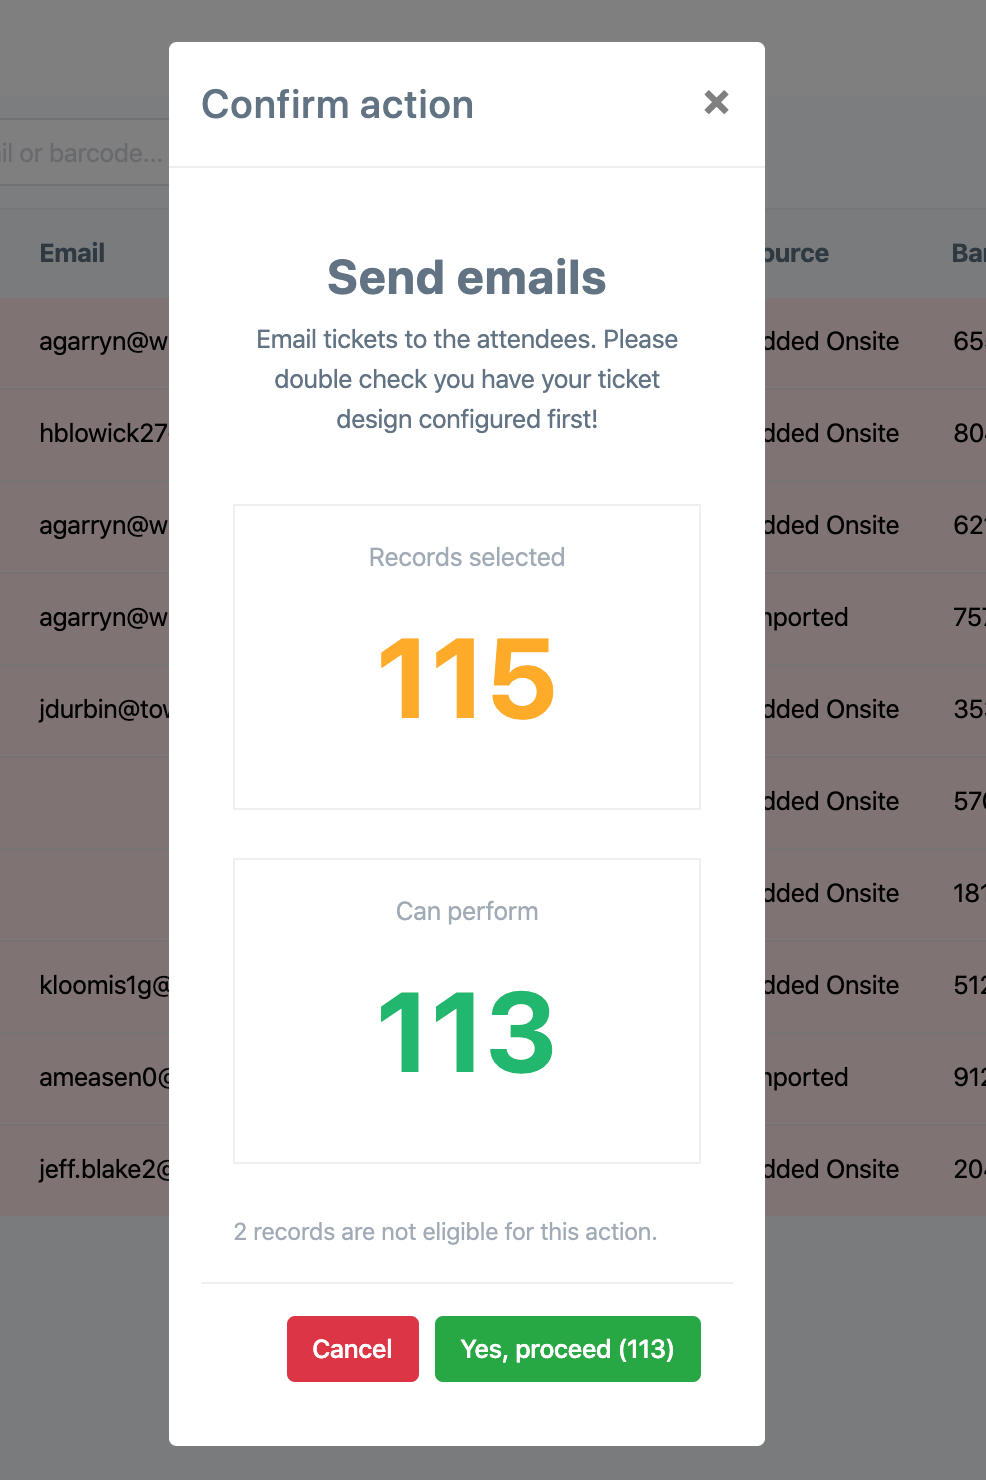
You will a have a chance to confirm how many emails are about to be sent. If it looks correct, click the green Yes, proceed button.
You did it!
Scan tickets
Install the event check in app
See our article on installing the event check in app here!
Set up the app
On the app, select your event from the lists of events. Tap on the Scan tab from the bottom bar. Grant permission to use the camera scanner. Now try scanning a ticket!
Rent ticket scanners
For events of 300, 400+ attendees, we recommend renting laser ticket scanners. For smaller events, if you think you can pull it off, you can use the built-in camera on any iPhone or iPad to scan tickets. Learn more about the pros and cons of laser scanners vs camera scanners.
After the event
At any time during or after the event, you may view the online report which summarizes check ins, by ticket type, etc. You will also be emailed a link to the report after the event. Learn more about accessing the event report here.
