Lists are a simple, powerful way to group guests together. For example, our clients have used lists to group their guests by company name, affiliate, promoter, vendor, sponsor, etc. It is up to you how you want to segment guests.
Using lists allow you to get checkin summaries by list, for example you may want to know how many guests “Sponsor A” brought, and how many were checked in.
There are two important concepts for lists:
Permanent Lists
Permanent lists are account wide and available for re-use for all of your events. For example, if you regularly work with a particular company, sponsor, etc, and want to track guests brought across many events, you would set them up as a Permanent List, and add that permanent list to each relevant event.
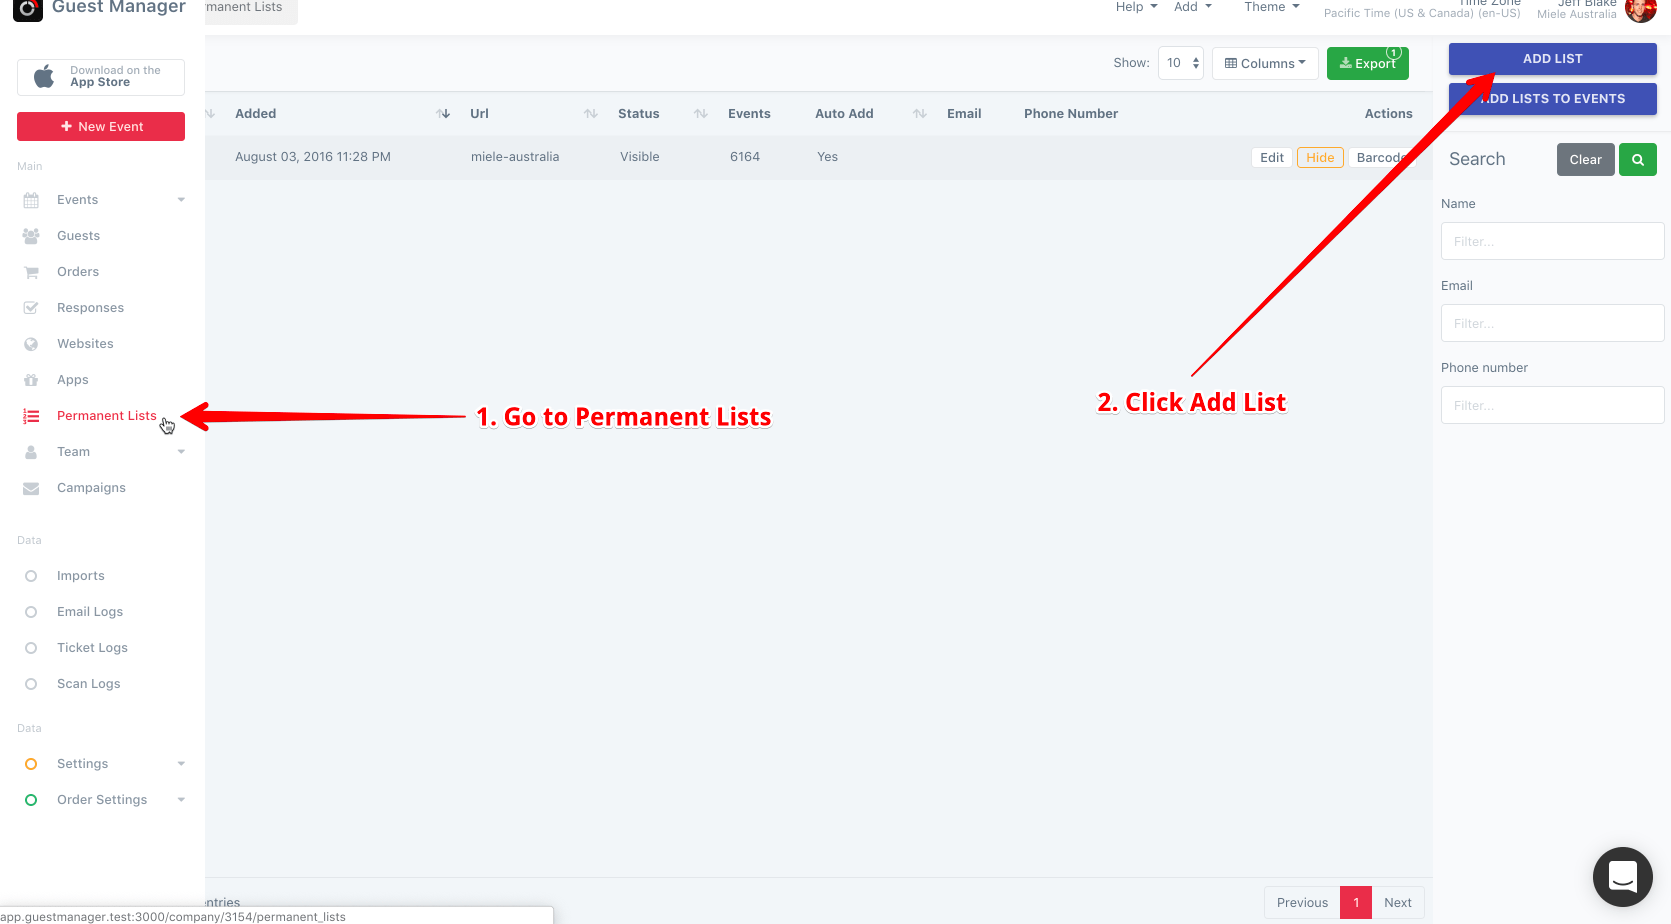
How to add: Look for the Permanent Lists icon from the left hand menu in your dashboard. Once you create a list, add it to some or all of your events.
Lists
A list is a one-off list for an event. If the particular list is only relevant for one event, you would create them as a List within the event, available for use for that event only.
How to add: Click on Manage for one of your events, and then select the Lists option from the sidebar on the left. Click Add List and enter your lists, one per line, and click save.
Permanent lists allow you to track tickets and guest lists under a common name, across many events. For example, a night club with many promoters would use a permanent list for each promoter, or a corporate event may use permanent lists to track guests by which Company they belong to.
Other words to describe permanent lists: source, promoter, staff member, vendor, referral, category, sponsor, etc.
Creating permanent lists

Navigate to Permanent lists and click Add List.
From the popup, fill in the name for the list.
Optional: If you want to give login rights to this permanent list, and/or this list correlates to a person, fill in the email and/or phone number as well.
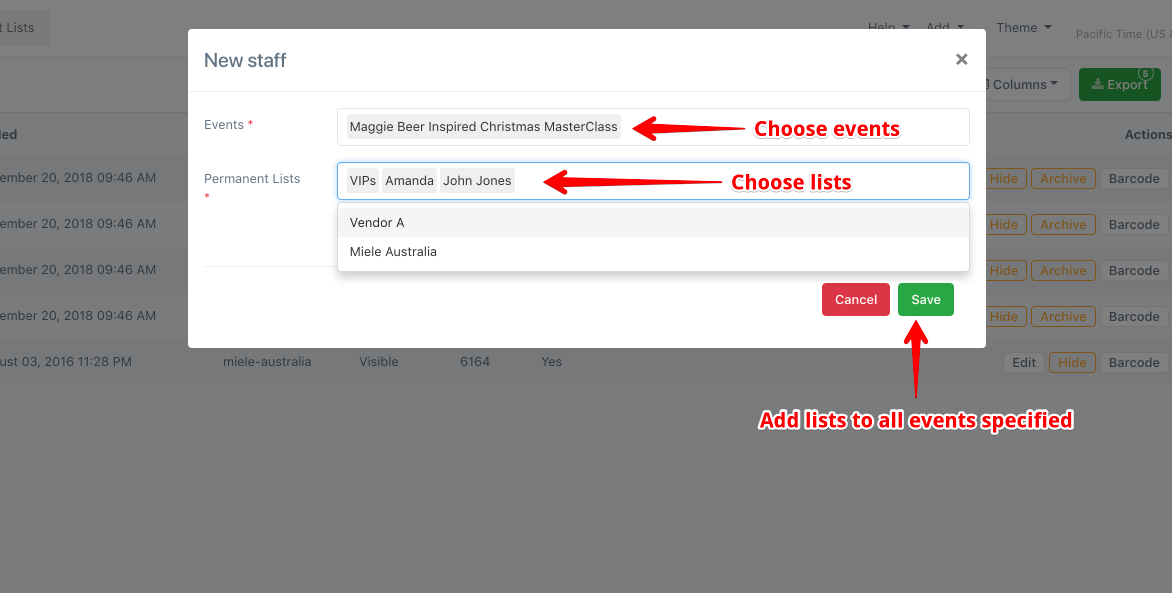
Add to events
Once permanent lists are created, you need to add them to upcoming events. This can be done automatically using the “auto add” checkbox when adding a list, or you can add lists to events manually:

Viewing lists added to a particular event
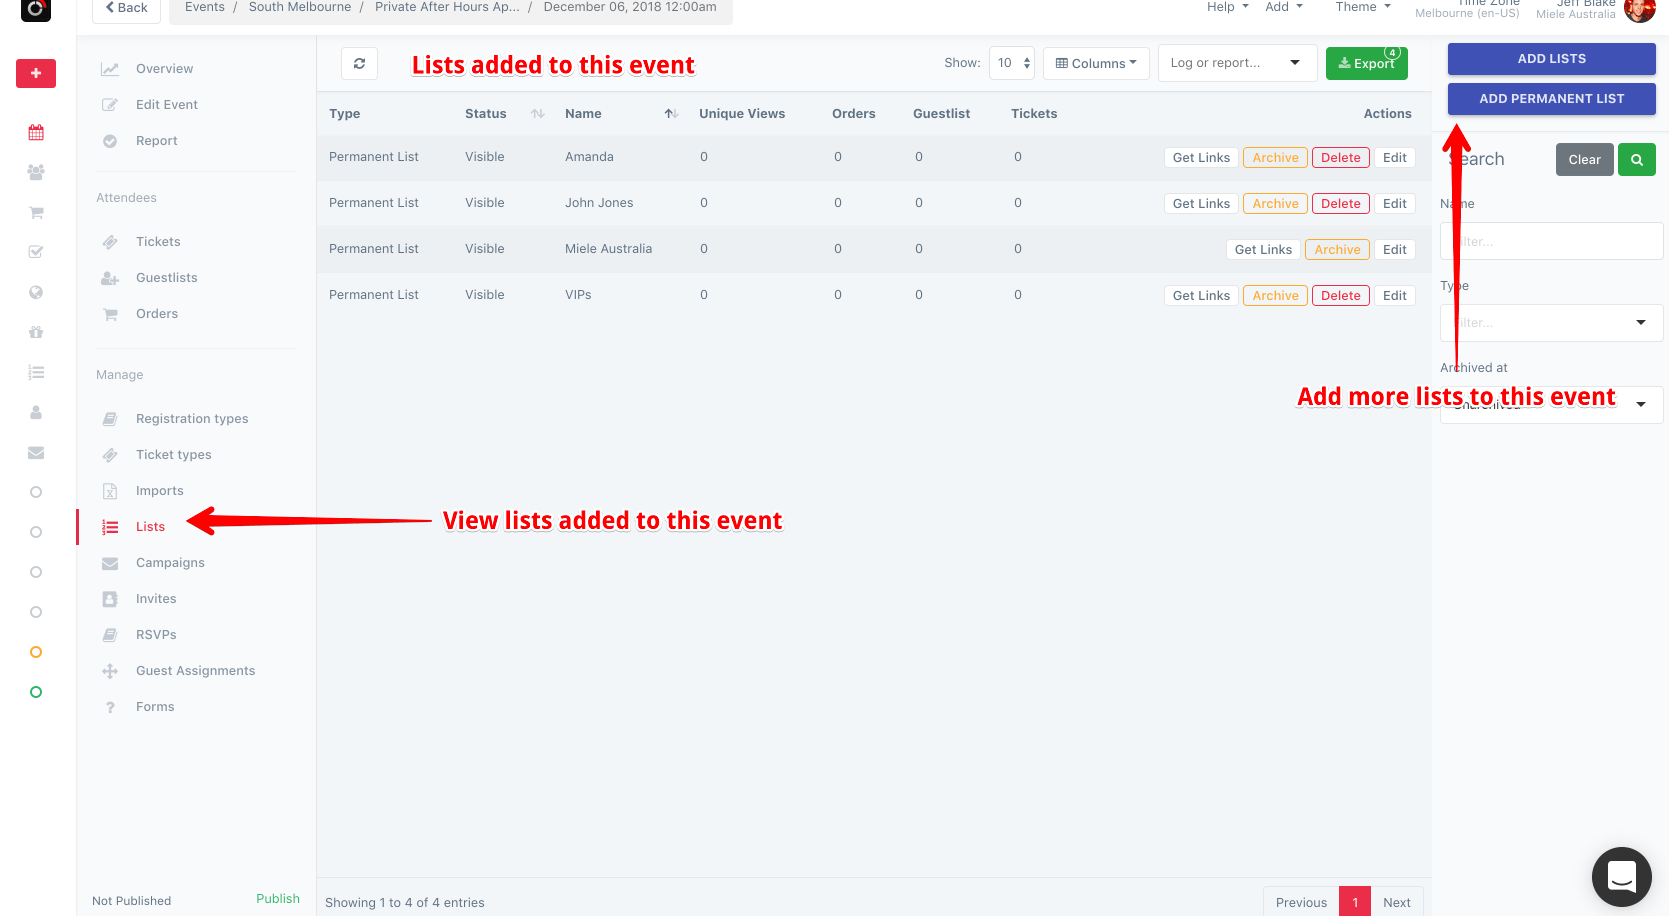
Go to your event in Events > Upcoming. Click on **Lists. **

From here you can see all the lists and permanent lists added to this event. You may also add more on the right. “Add Lists” will add a one-off list, not a permanent list.
Tracking tickets or guest lists to permanent lists
Tickets and guest lists can be tracked to permanent lists in a variety of ways. For example, when importing guests, simply add a column called “List” to the import. It is important to note here that if the List name does not correlate to a permanent list already setup in the system, then a one-off list will be created for that event. So if you want the lists to be permanent, set them up in advance of your import, and make sure the name in the import matches the permanent list name exactly.
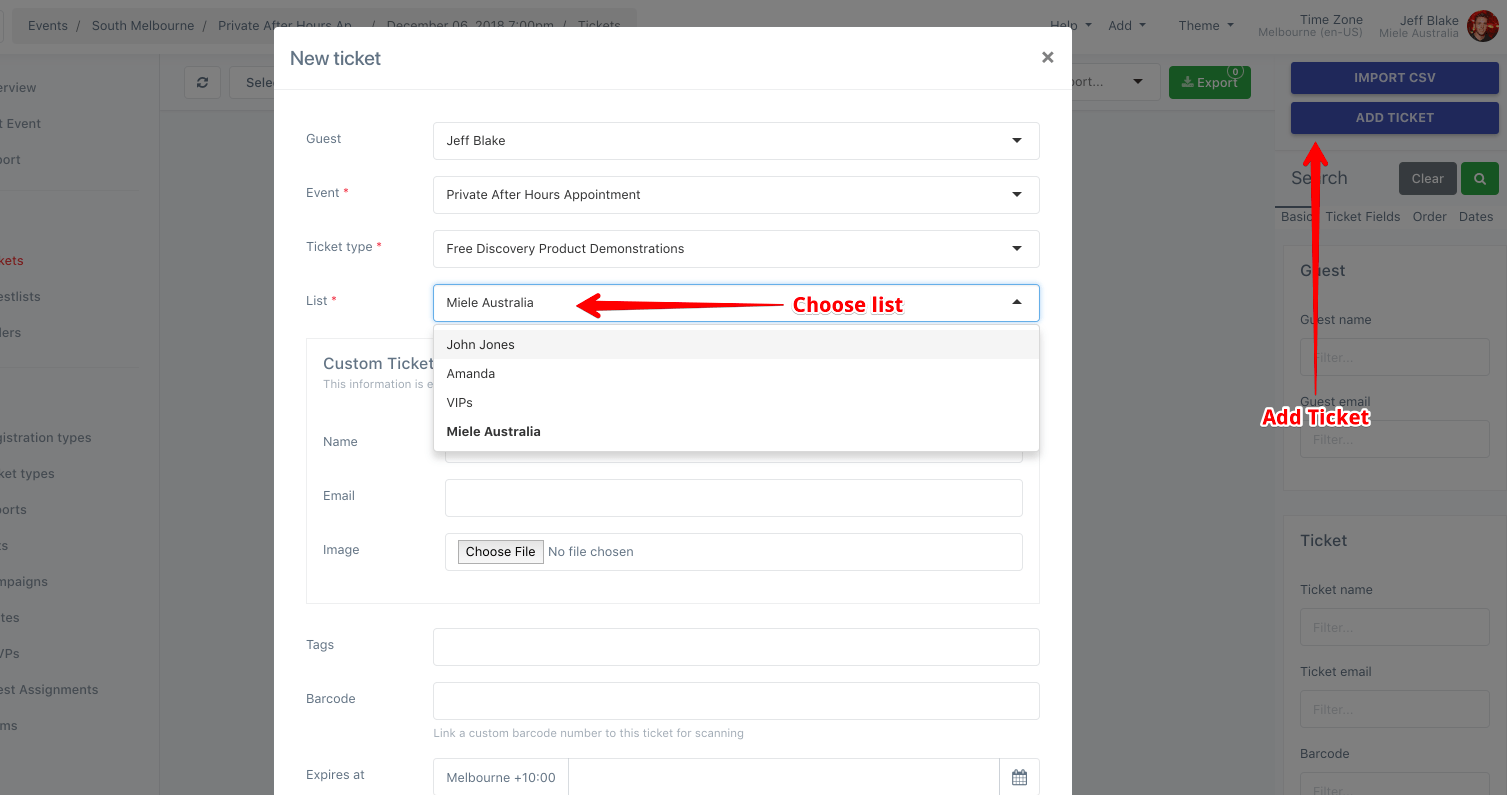
You can also set the permanent list when adding tickets one by one in the interface, as well as changing the list for an existing ticket:
