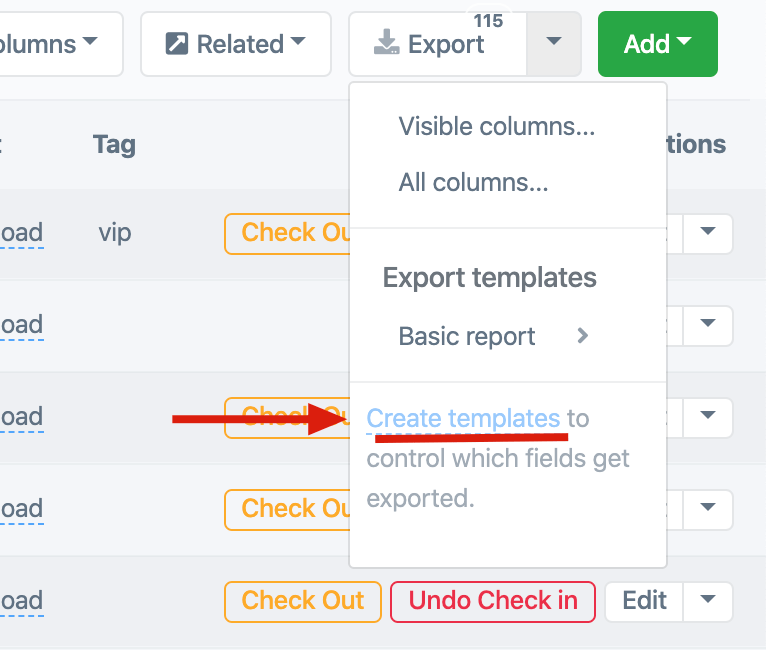
We strive to make exporting data always a click away. It would suck if you had to go to separate areas to build reports, wait for it, etc. In Guest Manager, look for the Export button in the upper right of any list view to export data directly to CSV. The export button respects your current search, filter, and column visibility.

Export current view
By default, clicking Export will export the currently visible columns, and preserve the order.
Export all columns
If you have customized (i.e. hidden some columns) the view, but wish to get an export of all columns, then choose this option.
Export related data
Some areas, such as Attendees and Orders, have an extra button to export related data. For example, attendees have notes and scan logs, orders have line items, payments, tickets, etc.

Export templates
If exporting the current view, or all columns doesn’t quite cut it, you can create re-usable templates and access them at a click. For example, let’s say you want to add an option in the dropdown to export First name, last name, and email only.
This feature is available for Attendees only at this time
Create a new template

Click Create templates from the Export dropdown to get redirected to the template creator.
On the following page click the green New button.

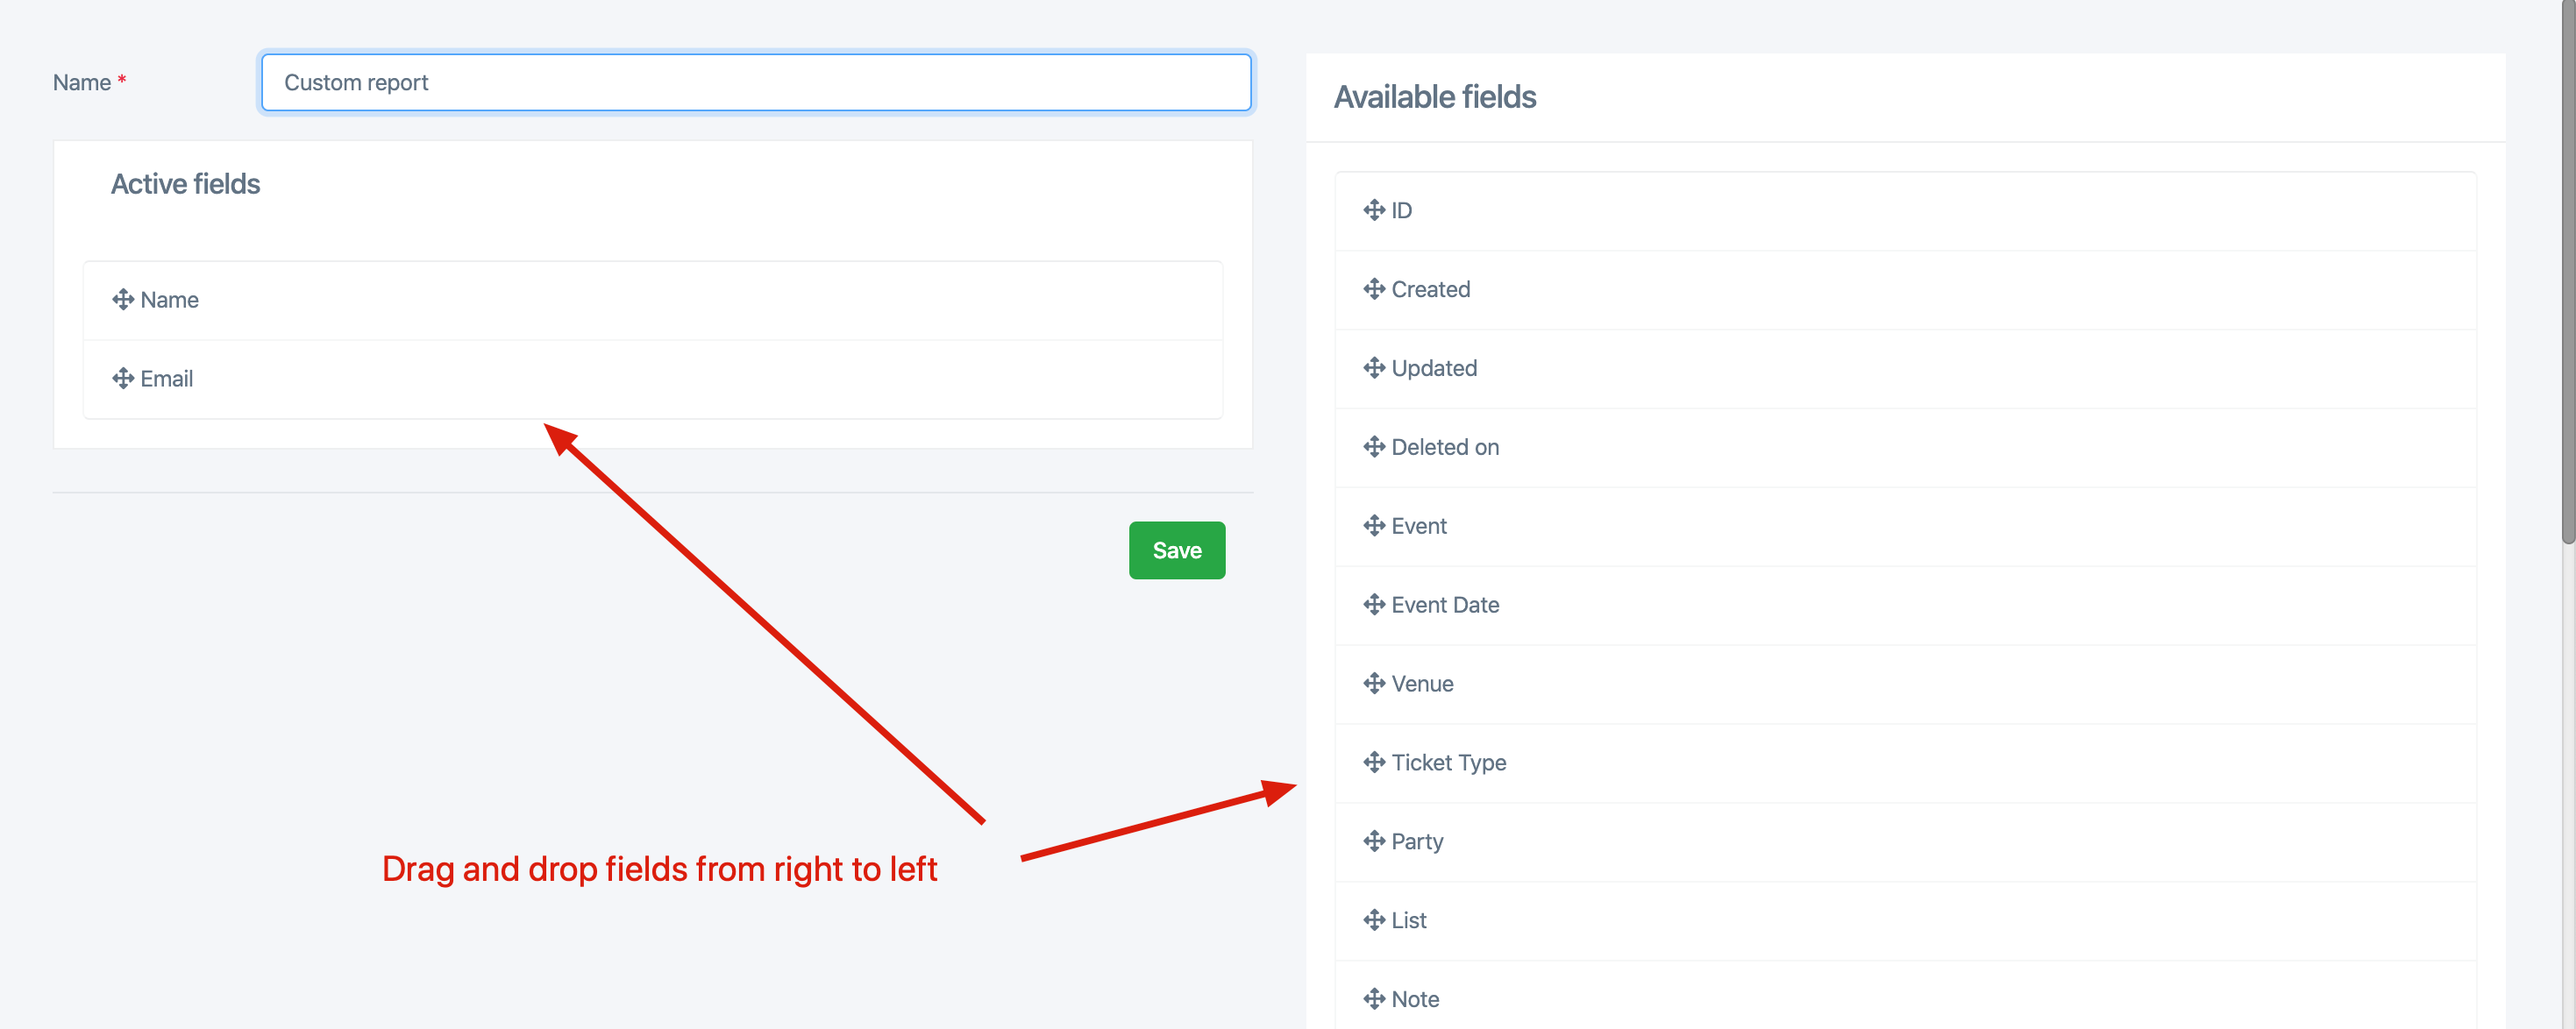
Drag and drop available fields on the right, to the Active fields on the left. Name and save the template, then go back to the Attendee list (where you were previously) and open the Export menu again, to reveal your new export option.